Friday, July 6, 2018

Twirl in the Field, a Canvas (7 Dots Studio)

Dear crafty friends,

I'm here today to share with you a step by step photo tutorial I created for 7 Dots Studio. I decided to create a canvas. Here it is.


I was inspired by the moodboard from Mixed Media & Art.


Since I received my DT package, I had this idea of creating a fairy project because of one of the images from the Knotty paper. It's the one on the bottom left corner. 
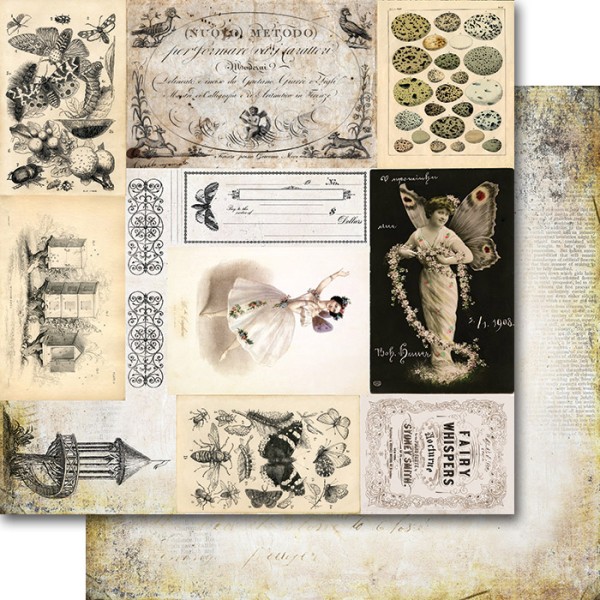

To me, it looks like a little fairy house. 

Let me walk you through my process.

Step one:
I chose an 8x10 canvas. I applied some 3D Matte Gel through the Soulmates Squares stencil and dried everything with my heat tool.


Step 2:
I applied my first layer of color using the green paste from the Military Rust Paste set and a Stencil brush. I used some water here and there to make a variation in color. 


Step 3:

Second layer of color, using the yellow paste, also from the Military Rust Paste set. This time, I applied it with a palet knife.


Step 4:
Adding yet another color. This time, I selected Jade Impasto Paint and applied it with a brush.


Step 5:
Another color for highlight: Green Apple Impasto Paint, applied with a palet knife.


Step 6:
It was very intense, so I decided to apply a mixture of Texture Paste White Sand and White Gesso through the Dreamscapes Geometry stencil. I love the texture added and the white just tone down the colors. 


Step 7:
I stamped a butterfly and a ladybug from the Garden Party Clear Stamps set and fussy cut them. I painted a light coat of green paste on my butterfly to match with my fairy (you'll see later). I also fussy cut a few images from the Garden Party Knotty paper.


Step 8:
I'm building my composition with pieces of the Knotty.


Step 9:
I'm beginning to add layers with chipboards and cut pieces.


Step 10: 
Adding rope, burlap, lace and Prima flowers, along with my little fairy house die-cut and my «fairy». Have you noticed that I used my stamped butterfly as her wings?


Step 11:
I've added some gold flower lace from Prima and my cut out butterflies and fly. I also added some Melange Art Pebbles.


Step 13:
Adding my favorite finishing touches: Die-cut Elements, Element Stickers and Word Stickers from the Garden Party collection.


Step 14:
Some Art Stones, Mega Art Stones, Micro Beads and flakes, just for added texture.


I forgot to take a last picture, but I stamped just a little bit on my background with the text stamp from the Garden Party Clear Stamps set and black Archival Ink. 

And voilà!

A few close-ups!


7 Dots Studio supplies used:
Dreamscapes - Geometry Stencil
Soulmates - Squares Stencil

I really hope you like my project. 

Have a nice day.
Karine
xx


Wednesday, July 4, 2018

Wild at Heart (7 Dots Studio)

Hello,

I'm almost done sharing my latest creations. This time, I'd like to share my layout created for 7 Dots Studio July challenge. Here it is.


I was inspired by the teals and greens of the moodboard.


I created a video tutorial, to share my creating process.


7 Dots Studio supplies used:

I really hope you get the chance to play along with us! All you have to do is to create a 7 Dots Studio based project inspired by the moodboard and share it with us on the blog.


Rosy Cheeks (7 Dots Studio)

Dear friends,

It's me again, with another creation from last month. This time, it's my monthly share over at 7 Dots Studio. I created this layout, along with a video tutorial. I hope you like it.


7 Dots supplies used:
Cotton Candy Dreams - Strawberry Fields
Cotton Candy Dreams - 12x12 Tags
Cotton Candy Dreams - Word Stickers 6x12
Dreamscapes - Geometry Stencil
Hazy Days - Birds on a Wire Stencil
Writers Block - Letters Stencil
Thoughts Keeper - Clear Stamps


An altered box (Prima Marketing)

Hello again,

I will slowly get to share everything I created in the past month or so! This time, I'd like to share with you a box I created with the new Texture Fantasy Paste from Finnabair. I got to mix different sets to get those colors. I love the end result.


I just love the texture of those paste!

Prima supplies used:


An altered embroidery hoop with Santa Baby collection and JN stamp (Prima Marketing)

Hello again,

I know it's summer (and a very hot one here! As I write this post, we have a hot 97 degres (or 36, if you use Celcius), but I got to create my very first Christmas project with the beautiful Santa Baby collection and one of the new Julie Nutting stamps for this year. Here it is.


Isn't this collection beautiful? I really hope my project inspires you to get crafty!

Prima supplies used: 
573782 - Color Bloom - Soft Teal 


Mini-album with Memory Hardware (Prima Marketing)

Hello dear friends,

May and June were so busy here with school that I didn't get any time to share with you my latest creations. So I'll be brief, but I'll show you what you may have seen on Prima's blog a few weeks ago. I got to share my first mini-album. I always thought it was a quick and easy project, but I was so wrong. I spent a WHOLE day at a scrapbook retreat creating this mini-album. I used the beautiful Havana collection. I gave it to my mother on Mother's Day.


Prima supplies used: