
I'm here today to share with you a step by step photo tutorial I created for 7 Dots Studio. I decided to create a canvas. Here it is.

I was inspired by the moodboard from Mixed Media & Art.

Since I received my DT package, I had this idea of creating a fairy project because of one of the images from the Knotty paper. It's the one on the bottom left corner.
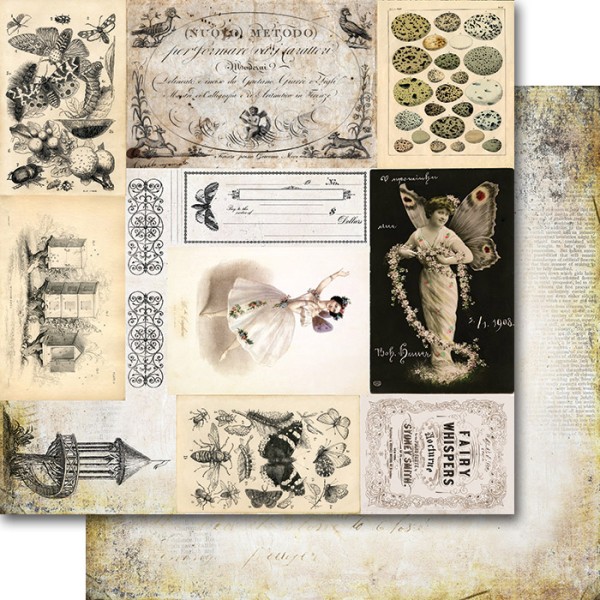
To me, it looks like a little fairy house.
Let me walk you through my process.
Step one:
I chose an 8x10 canvas. I applied some 3D Matte Gel through the Soulmates Squares stencil and dried everything with my heat tool.

Step 2:
I applied my first layer of color using the green paste from the Military Rust Paste set and a Stencil brush. I used some water here and there to make a variation in color.

Step 3:
Second layer of color, using the yellow paste, also from the Military Rust Paste set. This time, I applied it with a palet knife.

Step 4:
Adding yet another color. This time, I selected Jade Impasto Paint and applied it with a brush.

Step 5:
Another color for highlight: Green Apple Impasto Paint, applied with a palet knife.

Step 6:
It was very intense, so I decided to apply a mixture of Texture Paste White Sand and White Gesso through the Dreamscapes Geometry stencil. I love the texture added and the white just tone down the colors.

Step 7:
I stamped a butterfly and a ladybug from the Garden Party Clear Stamps set and fussy cut them. I painted a light coat of green paste on my butterfly to match with my fairy (you'll see later). I also fussy cut a few images from the Garden Party Knotty paper.


Step 8:
I'm building my composition with pieces of the Knotty.

Step 9:
I'm beginning to add layers with chipboards and cut pieces.

Step 10:
Adding rope, burlap, lace and Prima flowers, along with my little fairy house die-cut and my «fairy». Have you noticed that I used my stamped butterfly as her wings?

Step 11:
I've added some gold flower lace from Prima and my cut out butterflies and fly. I also added some Melange Art Pebbles.

Step 13:
Adding my favorite finishing touches: Die-cut Elements, Element Stickers and Word Stickers from the Garden Party collection.

Step 14:
Some Art Stones, Mega Art Stones, Micro Beads and flakes, just for added texture.

And voilà!
A few close-ups!


7 Dots Studio supplies used:
Dreamscapes - Geometry Stencil
Soulmates - Squares Stencil
Have a nice day.
Karine
xx

Superbe!
ReplyDeleteLove this Karine! Thank you for joining Mixed Media & Art in June!
ReplyDeleteTellement jolie!!! J'adore ton canvas! Merci pour ta participation au défi Mmart xx
ReplyDelete