Thursday, July 28, 2016

Magique (Blue Fern Studios)

Hi,

I'm up again today to share my last layout from Blue Fern Studios.

Magique


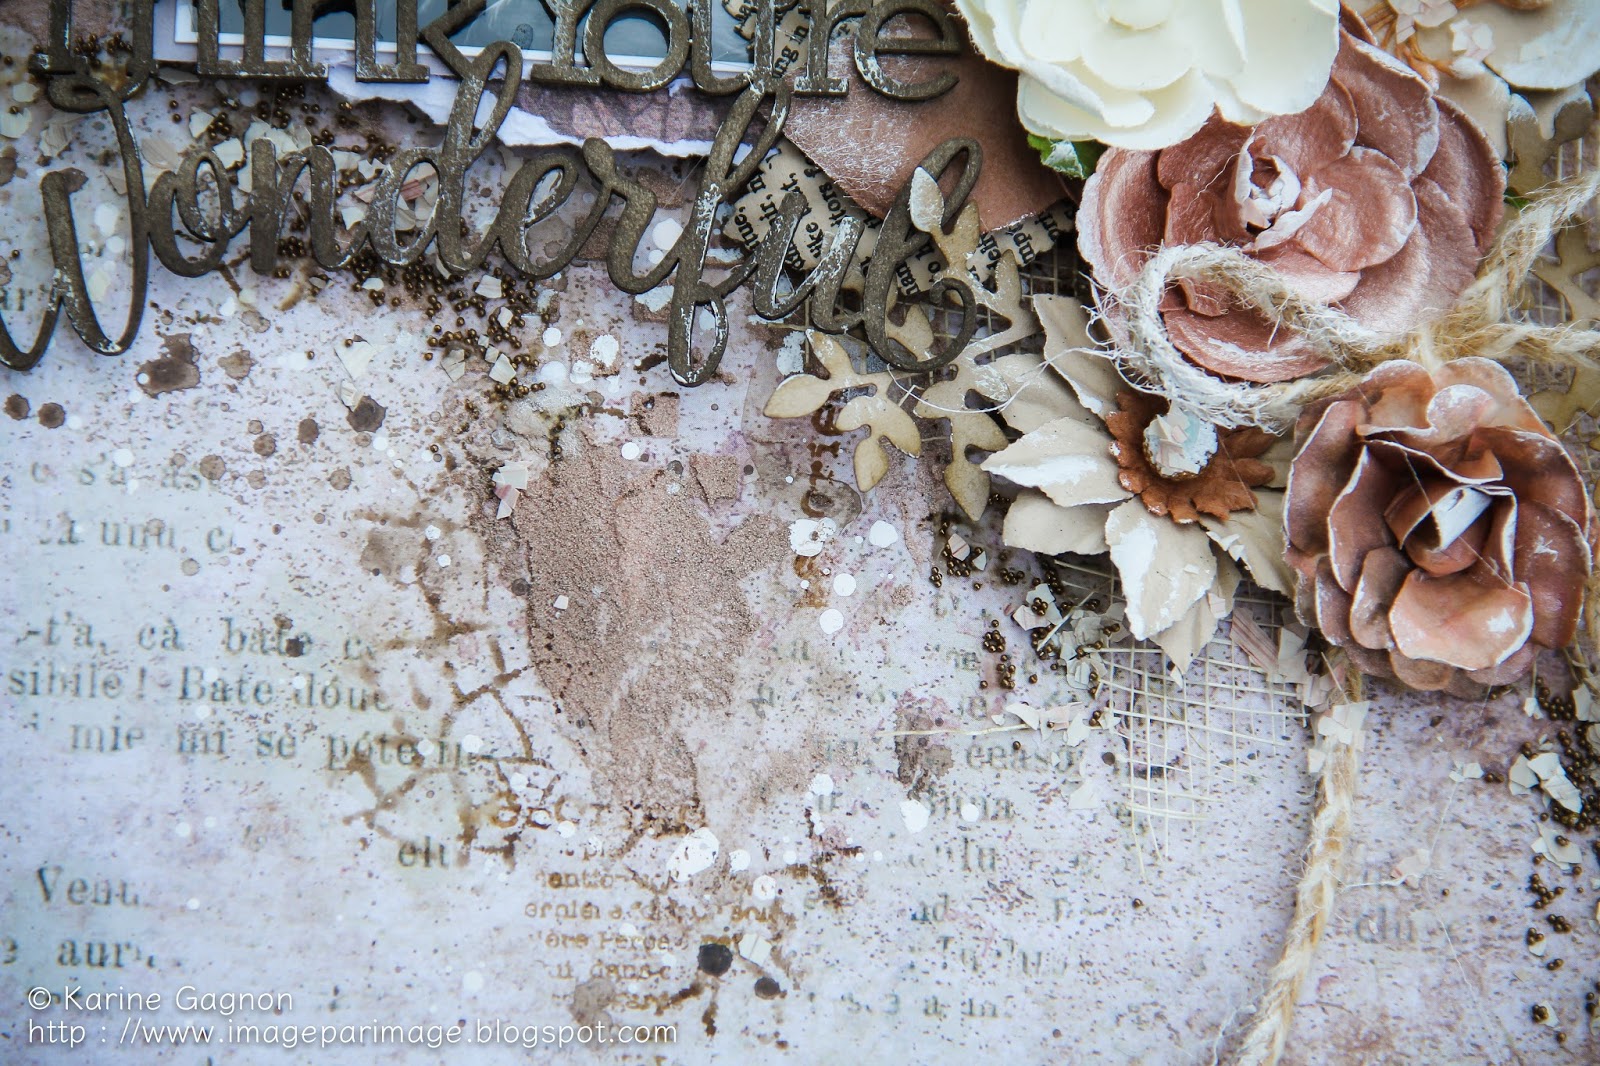
My layout uses the Regalia paper again from the Seaside Cottage collection. I just loooooove this paper! On my background, I used the Postal Textures stamps.


On the left side of the layout, I used the Royal Border, which I painted with an aqua metallic paint. While the paint was still wet, I sprinkled some Imagine Ink pearl embossing powder and heat set it. I love the end result. I also used a speech bubble with a heart (I hid the tail of the speech bubble under my flowers) from the Picture Perfect set. It was given the same treatment as the Royal Border.


To frame my main composition, I cut one of the Classic Ornaments in half and used both pieces (painted and embossed) around my flowers.


I used flowers from the Seaside Lilies, Tranquil Blooms and Tranquil Roses and Lilies. The little heart shape above the large mint flower comes from the heart speech bubble from the Picture Perfect set. 


My title is part of the French Adjectives 2 set. It was coated with white gesso, and then painted with cream ink.

Blue Fern Studios product used:
Regalia paper again from the Seaside Cottage collection
Royal Border
Classic Ornaments
Picture Perfect
French Adjectives 2
Postal Textures stamps
Seaside Lilies
Tranquil Blooms
Tranquil Roses and Lilies
Imagine Ink pearl embossing powder

I hope this inspires you to get creative!

Have a nice day.

Tuesday, July 26, 2016

Smile (Blue Fern Studios)

Hi, crafters,

I'm here today to share my first layout made with the gorgeous Seaside Cottage collection from Blue Fern Studios. Here it is.

Smile


For this layout, I used the Mermaid paper. I altered it with two different stencils and with two texture paste: one white, one a gorgeous sandy color. I also used a blue ink spray.


I choose the Persian Ornament to go under my picture. I embossed it with Imagine Ink snow embossing powder.


To go over my picture, I chose the oval frame from the Mini Frames set, which I embossed also using the snow embossing powder. 


I used some of the Tranquil Roses and Lilies in my flower arrangements. 


My title piece, part of the Funny, Giggle, Smile set, was embossed in snow. Look at this close up on the paper. Isn't it just gorgeous?

Blue Fern Studios products used:
Mermaid paper from the Seaside Cottage collection
Persian Ornament
Mini Frames
Funny, Giggle, Smile
Imagine Ink snow embossing powder
Tranquil Roses and Lilies

Have a nice day.

Sunday, July 24, 2016

Happy (Blue Fern Studios)

Hi crafty friends,

I'm here today to share with you my first layout for Blue Fern Studios this month. 

Happy


My first layout was created using the Hushed paper from the Tranquility collection. I based my color combo on the colors in the paper. I stamped a few times with the Making Plans stamp.

My layout is based on the Crosshatch frame that I embossed with Imagine Ink auburn and garnet embossing powders. 


To add more interest around my picture, I used the Ironwork Edges, that I embossed with a dark brown embossing powder. 


As for embellishments, I used some Courtship Blooms dans some Attic Charm Daisies. 


My title, the Happy word from The Optimist Word Set, was left raw.

Blue Fern Studios products used:
Hushed paper from the Tranquility collection
Making Plans stamp
Crosshatch frame, The Optimist Word Set and Ironwork Edges
Courtship Blooms, Attic Charm Daisies
Imagine Ink Auburn, Garnet embossing powders

I hope you like it.


Monday, July 18, 2016

Joy - Shimmerz Paints

Hi,

Here is my second layout for Shimmerz Paints this month.


I used the Dreamy paper from the Homegrown collection by 7 Dots Studio. I primed it with clear gesso.


I used some Tidy Widy Texturez through a rectangle stencil to build texture on my background.


To add even more texture and contrast, I selected another stencil and used Licorice Stick Dazzelerz. When everything was dry, I used my favorite color these days, Deep Blue Sea Vibez, to spray and make some drops.  


I didn't have enough flowers to match my layout, so I chose a white one with a script print, and I used Teal the End of Time Shimmerz with lots of water to color it. I'm pretty pleased with the result. I also used this Shimmerz to make a few drops on the background.


My title piece is covered with Tidy Widy Texturez that I painted with Deep Blue Sea Vibez and a little bit of water. Tags and die cuts are from the Homegrown collection, by 7 Dots Studio.

I hope you like it.


Friday, July 15, 2016

I Think You're Wonderful - Words & Paintery

Hi,

Here is my layout for this month's Words & Paintery challenge.


I did go a little s oft on the coral color, but I love the result.


Wednesday, July 13, 2016

Love - Prima BAP

Hi,

I created a layout for the Prima Build-A-Page. Here it is.


Here is the sketch:


Hope you like it.


Monday, July 11, 2016

Be the Main Character (7 Dots Studio Challenge)

Hi there, crafty friends,

I have a layout today to share. wit was inspired by 7 Dots Studio challenge: urban theme. This picture of my son in front of a graffiti wall is as urban as it gets!


I used the Snicker paper from the Homegrown collection. I also used the tags from the collection. 


On my background, I used stamps from Lost and Found and Thoughts Keepers


I used the words stickers from the Homegrown collection.


Thanks for looking.


Tuesday, July 5, 2016

We Don't Remember Days, We Remember Moments (Shimmerz Paints)

Hi there, creative souls,

I have a quick and easy layout to share with you and on the Shimmerz Paints blog today. 

We Don't Remember Days, We Remember Moments


I started with the Mistletoe paper from the Yuletide collection by 7Dots Studios. I covered it with clear gesso.


My favorite color, these days, is Deep Blue Sea Vibez. So I started out with it, making some drops and adding water to blend in some places. When it was dry, I thought it was pretty, but there was something missing.


I decided to add another color: Carribean Sunset Spritz, for a soft touch. I did the same: drops and water in some places, and the, dry with a heat tool.


To add more interest, I used white paint to make some white drops. Some stamping and embellishing, and it all came up pretty quickly.


For my title piece, I used the same two colors as for my background, and I painted them on my primed chipboard. Isn't it gorgeous?

Have a creative day.

Karine